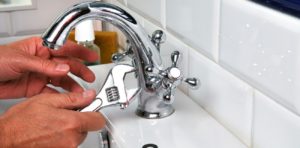
3 Tips To Repair Old Faucets In San Diego
Old faucets can be a source of frustration in any home. The constant dripping, leaks, and squeaky handles are not only annoying but can also waste water and increase your utility bills. Fortunately, repairing old faucets is not as daunting as it may seem. With a few simple tools and some know-how, you can breathe new life into your old faucets and extend their lifespan. In this article, we will share three valuable tips to help you repair old faucets and make them function like new.
Identify the Problem
Before you start taking apart your faucet, it’s crucial to identify the specific problem you’re dealing with. Faucets can have a variety of issues, including leaks, low water pressure, and noisy handles. Identifying the problem correctly will help you determine the necessary repairs and avoid unnecessary disassembly.
For example, if your faucet is leaking, the issue could be a worn-out rubber washer or an O-ring. To fix this, turn off the water supply to the faucet, remove the handle, and replace the damaged washer or O-ring with a new one. On the other hand, if you’re experiencing low water pressure, the problem might be caused by mineral deposits clogging the aerator. Simply unscrew the aerator, clean it thoroughly, and reattach it to restore proper water flow.
Gather the Right Tools
Having the right tools at your disposal is essential for a successful faucet repair. Here are some common tools you’ll need:
- Adjustable wrench
- Screwdrivers (both flathead and Phillips)
- Plumber’s tape
- Replacement parts (washers, O-rings, aerator)
- Bucket or towels (to catch any water)
- Before you start working on your faucet, ensure you have these tools on hand to make the repair process smoother and more efficient.
Follow Proper Disassembly and Reassembly
When disassembling your faucet, it’s essential to do so carefully and methodically to avoid damaging any components. Start by turning off the water supply to the faucet. Then, remove the handle by using an adjustable wrench or screwdriver. Once the handle is off, you can access the inner components of the faucet.
Take note of the order in which you remove the parts, as you’ll need to reassemble them in the same sequence. Clean all components thoroughly, removing any debris or mineral deposits that may be causing the issue. If you’re replacing any parts, such as washers or O-rings, make sure they are the correct size and type for your faucet.
When reassembling the faucet, apply plumber’s tape to the threads of any connections to create a watertight seal. Tighten all parts securely, but be careful not to over-tighten, as this can damage the faucet.
FAQs
Can I Repair A Faucet If I Have No Plumbing Experience?
Yes, you can repair a faucet even if you have no plumbing experience. Many faucet issues can be fixed with basic tools and a little research. There are plenty of online tutorials and step-by-step guides available to help you through the process. However, if you’re unsure or uncomfortable with the repair, it’s always a good idea to consult a professional plumber.
How Do I Stop A Faucet From Dripping?
To stop a faucet from dripping, you’ll typically need to replace the rubber washer or O-ring inside the faucet. Turn off the water supply to the faucet, remove the handle, and replace the damaged washer or O-ring with a new one. This should create a proper seal and stop the drip.
What Should I Do If I Can’t Identify The Problem With My Faucet?
If you can’t identify the problem with your faucet or if the issue persists after attempting repairs, it’s best to seek the help of a professional plumber. They have the expertise and tools to diagnose and fix more complex faucet issues.
Please call Frasers Plumbing at (619) 332-0275 for any and all of your plumbing needs.
Conclusion
Give Fraser Plumbing Inc. a call right away to learn more about how our experts can help with leak detection in San Diego, CA.

