How To Install Shower Valves In San Diego?
Updating or replacing shower valves is a common task that homeowners often undertake to enhance their bathing experience or fix plumbing issues. A shower valve controls the water flow and temperature, ensuring a comfortable and enjoyable shower. Installing a shower valve might seem like a daunting task, but with the right tools, preparation, and following a systematic approach, it can be a manageable DIY project. Here’s a step-by-step guide to help you install shower valves effectively:
Before you begin, ensure you have all the required tools and materials. You’ll need a pipe wrench, adjustable wrench, pliers, Teflon tape, soldering equipment (if installing a soldered valve), a screwdriver, and a replacement shower valve. If you’re unsure about the type of valve you need, consult a plumbing professional.
Always start by turning off the water supply to the bathroom. Locate the main water shut-off valve for your home and close it. Open the faucets in the bathroom to drain any remaining water in the pipes.
Use the appropriate tools to remove the old valve. If it’s soldered, you’ll need to cut the pipe using a pipe cutter or hacksaw. If it’s a threaded valve, carefully unscrew it using pliers or a wrench.
Once the old valve is removed, clean the pipe ends to ensure a proper seal. Use a wire brush or sandpaper to remove any debris or residue.
Follow the manufacturer’s instructions to install the new valve. If it’s a threaded valve, wrap Teflon tape around the threads to create a watertight seal. Thread the valve onto the pipes and tighten it using a wrench.
If your new valve is soldered, follow proper soldering procedures. Apply flux to the cleaned pipe and valve joints, then use a propane torch to heat the joint. Once the joint is hot enough, touch the solder to the joint, and it should melt and create a secure connection.
Turn the water supply back on and test the valve. Check for any leaks or drips. If you notice any, tighten the connections further.
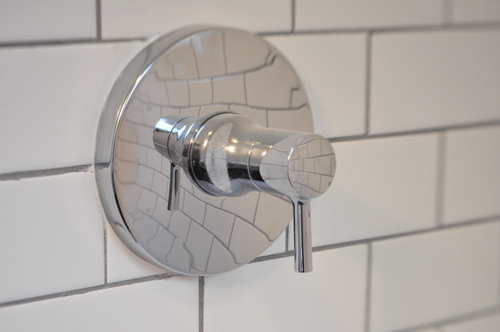
Apply a bead of caulk around the valve trim to create a watertight seal. Attach the valve trim according to the manufacturer’s instructions.
FAQs
Can I Install A Shower Valve Without Soldering?
Yes, you can. There are threaded shower valves available that don’t require soldering. These valves can be easily screwed onto the existing pipes, making installation simpler.
How Do I Know If I Need To Replace My Shower Valve?
You might need to replace your shower valve if you’re experiencing issues like inconsistent water temperature, leaks, or difficulty in turning the valve. If your valve is old and outdated, upgrading to a newer model can also improve your shower experience.
Is It Necessary To Hire A Professional For Shower Valve Installation?
While installing a shower valve can be a DIY project, it does require some plumbing skills. If you’re not comfortable with basic plumbing tasks, it’s advisable to hire a professional plumber to ensure the installation is done correctly and to prevent any potential water damage.
Please call Frasers Plumbing at (619) 332-0275 for any and all of your plumbing needs.
Conclusion
Give Fraser Plumbing Inc. a call right away to learn more about how our experts can help with leak detection in San Diego, CA.