Tips to Install a Shower Valve Like a Pro – DIY Network In San Diego
Looking to tackle a shower valve installation project? Whether you’re a newbie or a seasoned DIY enthusiast, these five expert tips will streamline the process and ensure a successful outcome. Say goodbye to costly plumber bills and hello to a satisfying sense of accomplishment. From tools of the trade to step-by-step guidance, we’ve got you covered. Ready to dive in and transform your bathroom? Let’s make leaky showers a thing of the past with these practical insights.
Before You Begin
Turn off Water
To start the process of installing shower valves, turn off the water supply to avoid any leaks. Locate the main water valve and shut it off.
Remember to open a nearby faucet to release any remaining pressure in the pipes before proceeding with the installation.
Cover Drain
Before you begin working on the shower valves, it’s essential to cover the drain to prevent any small parts from falling down and causing blockages.
A simple cover like a cloth or a drain stopper will suffice to ensure that no screws or nuts go missing during the installation process.
Gather Tools
Ensure you have all the necessary tools at hand before starting the installation. Gather tools such as an adjustable wrench, screwdriver, plumber’s tape, and a flashlight for better visibility.
Having all the tools ready will make the installation process smoother and more efficient, saving you time and effort.
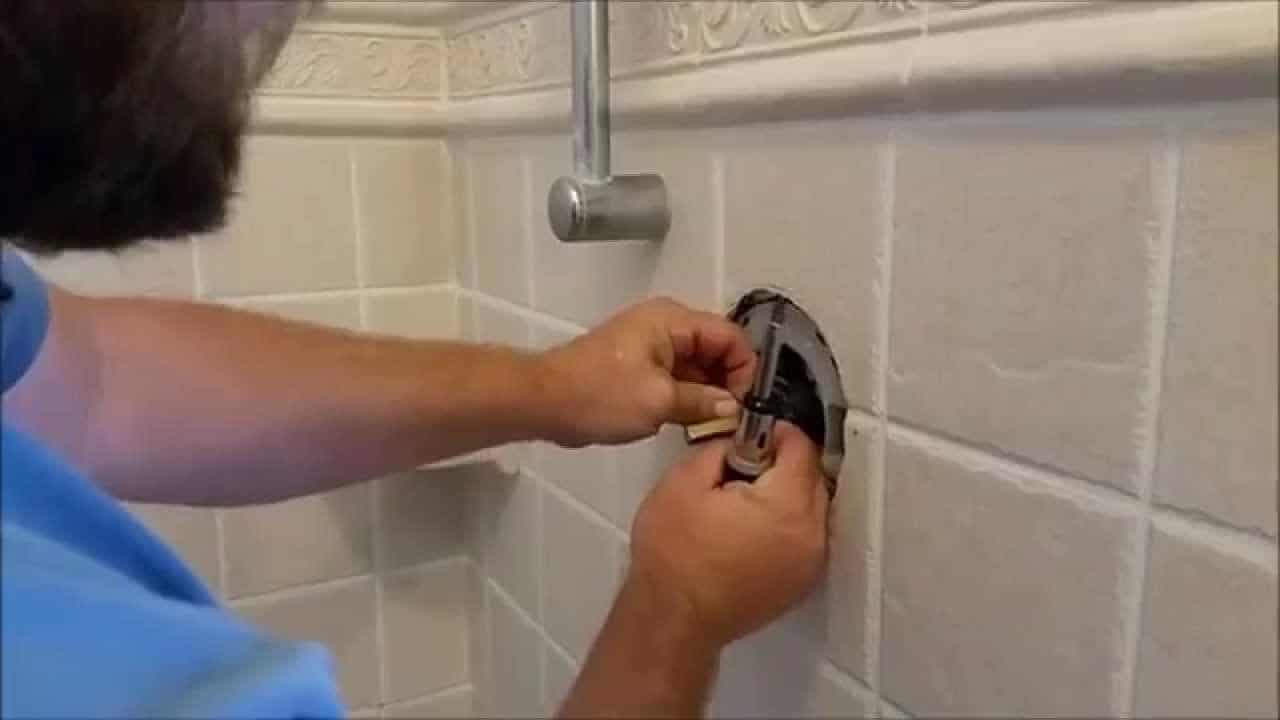
Removing the Old Valve
Handle Removal
To start removing the old valve, unscrew the handle using a screwdriver to reveal the valve stem beneath it. Next, carefully detach the handle from the stem to access the valve assembly.
Inspect the handle for any signs of wear or damage, as this could indicate issues with the valve itself. If necessary, replace the handle before proceeding with the removal process.
Clean Trim Plate
After removing the handle, focus on cleaning the trim plate surrounding the valve assembly. Use a mild cleaning solution and a soft cloth to wipe away any dirt, grime, or mineral deposits that may have accumulated over time.
Ensure that the trim plate is thoroughly cleaned to prevent any debris from interfering with the valve extraction process. A clean surface will make it easier to access and remove the old valve without any obstructions.
Valve Extraction
Once the handle and trim plate are removed and cleaned, it’s time to extract the old valve from the wall. Begin by loosening the retaining nut securing the valve in place using an adjustable wrench.
Carefully pull out the old valve from the wall, making sure to disconnect any remaining pipes or fittings attached to it. Inspect the area around the valve opening for any signs of damage or corrosion that may need attention before installing the new shower valve.
Choosing and Preparing the New Valve
Select Valve Type
When selecting a valve type, consider factors like pressure balance, thermostatic, or manual valves for different functionalities.
- Pressure balance valves maintain water temperature by balancing hot and cold water flow.
- Thermostatic valves regulate water temperature to prevent scalding or sudden temperature changes.
Ensure the new valve matches your shower system to guarantee optimal performance and safety.
Prepare Pipes
Preparing pipes is crucial before installing the new valve.
- Clean the pipes thoroughly to remove any debris or blockages that may affect water flow.
- Use appropriate tools like pipe cutters and deburring tools to ensure smooth pipe ends for a secure fit.
Check for leaks or damage in the pipes and make necessary repairs before proceeding with the installation.
Installation Steps
Assemble Valve
To assemble the valve, start by wrapping the male threads with Teflon tape for a secure fit. Then, carefully screw the valve into place using a wrench.
Next, attach the escutcheon plate over the valve and tighten it firmly to ensure a snug installation. Double-check all connections before proceeding to the next step.
Sweat Pipes
When it comes to sweating pipes, make sure to clean the pipe ends thoroughly using sandpaper. Apply flux to both the pipe and fitting before joining them together.
Using a torch, heat the joint evenly until the flux begins to bubble. Then, touch the solder to the joint, allowing it to flow smoothly around the connection.
Test for Leaks
After completing the installation process, it’s crucial to test for leaks. Turn on the water supply and observe all connections for any signs of leakage.
Check around the valve, escutcheon plate, and pipe joints for any drips or moisture. Address any leaks immediately to prevent water damage and ensure a properly functioning shower system.
Tips for Efficient Installation
Right Tools Use
To ensure a successful installation of shower valves, it is crucial to have the right tools at hand. Commonly required tools include an adjustable wrench, pipe cutter, Teflon tape, and a screwdriver.
- An adjustable wrench helps in securely tightening connections without causing damage.
- A pipe cutter ensures precise cuts for seamless fitting of pipes.
- Teflon tape is essential for creating a watertight seal, preventing leaks.
Leak Checks
After installing the shower valves, it is vital to conduct thorough leak checks to avoid potential water damage. Begin by turning on the water supply and inspecting all connections for any signs of leakage.
- Check for dripping or pooling water around the valve connections.
- Listen for any hissing sounds that might indicate a leak within the system.
Follow Instructions
Following manufacturer instructions is key to a successful installation process. Ensure you carefully read and understand the provided guidelines before starting the installation.
- Adhering to instructions helps prevent errors that could lead to leaks or malfunctions.
- Skipping steps or improvising can result in costly repairs down the line.
FAQs
How Important Is It To Prepare The New Valve Before Installation?
It is crucial to prepare the new valve properly as per manufacturer instructions to ensure a seamless installation process. This step helps prevent issues such as leaks or improper functioning of the shower valve in the future.
What Are The Key Considerations When Choosing A New Shower Valve?
When selecting a new shower valve, factors like compatibility with your existing plumbing setup, type of valve (pressure-balancing or thermostatic), and quality of materials should be prioritized. Ensure the valve meets safety standards and suits your specific needs.
Why Is It Necessary To Follow Specific Steps During The Installation Process?
Following precise installation steps is essential to guarantee the correct functioning of the shower valve. Each step is designed to ensure proper alignment, sealing, and connection, ultimately leading to a leak-free and efficient shower system.
Can I Reuse Any Parts From The Old Shower Valve During Installation?
While some components may appear reusable, it is recommended to use all new parts provided with the new valve. Reusing old parts can compromise the performance and longevity of the new shower valve, potentially leading to leaks or malfunctions in the future.
How Can I Ensure An Efficient And Successful Installation Of The Shower Valve?
To ensure a smooth installation process, carefully read and follow the manufacturer’s instructions, double-check all connections for tightness, test the system thoroughly before sealing everything up, and seek professional help if you encounter any challenges beyond your expertise.
Please call Frasers Plumbing at (619) 332-0275 for any and all of your plumbing needs.
Conclusion
Give Fraser Plumbing Inc. a call right away to learn more about how our experts can help with leak detection in San Diego, CA.