Ways to Install a Faucet: A Step-by-Step Guide In San Diego
Looking to tackle a DIY faucet installation project? Whether you’re a seasoned DIY enthusiast or a newbie, these 5 expert tips will guide you through the process effortlessly. Say goodbye to costly plumber bills and hello to the satisfaction of completing the task on your own. From choosing the right tools to mastering the art of leak-free connections, this guide covers it all. Get ready to take your plumbing skills to the next level with our simple yet effective tips.
Preparing for Installation
- Gather Tools
To start the faucet installation process, gather tools such as an adjustable wrench, plumber’s tape, and a bucket.
- Tools needed: Adjustable wrench, Plumber’s tape, Bucket
Ensure you have all necessary tools within reach to avoid interruptions during the installation process.
- Understand Faucet Types
Before beginning the installation, it is crucial to understand faucet types like compression, ball, cartridge, and ceramic disk faucets.
Different faucet types require specific installation techniques, so knowing the type beforehand will streamline the process.
- Clear the Workspace
Clear the workspace by removing any clutter or obstacles around the sink area to provide ample space for maneuvering during installation.
A clutter-free workspace ensures a smooth installation process without any hindrances.
Removing the Old Faucet
- Shut Off Water
To begin removing the old faucet, turn off the water supply by locating the shut-off valves under the sink. Rotate them clockwise to stop the water flow.
Using a basin wrench is crucial for loosening and disconnecting the nuts that secure the faucet in place. This tool’s long handle and swiveling jaw make it easier to reach tight spaces.
- Use Basin Wrench
After shutting off the water, position the basin wrench on the nut connecting the faucet to the water supply lines. Apply steady pressure in a counterclockwise direction to loosen and remove it.
To safely cut out the old faucet, use a tubing cutter or a hacksaw. Carefully sever any remaining connections between the faucet and water supply lines before pulling out the old fixture.
- Cut Out Old Faucet
When cutting out the old faucet, ensure you have a bucket or towels handy to catch any residual water. Dispose of the old faucet responsibly, considering recycling options if available.
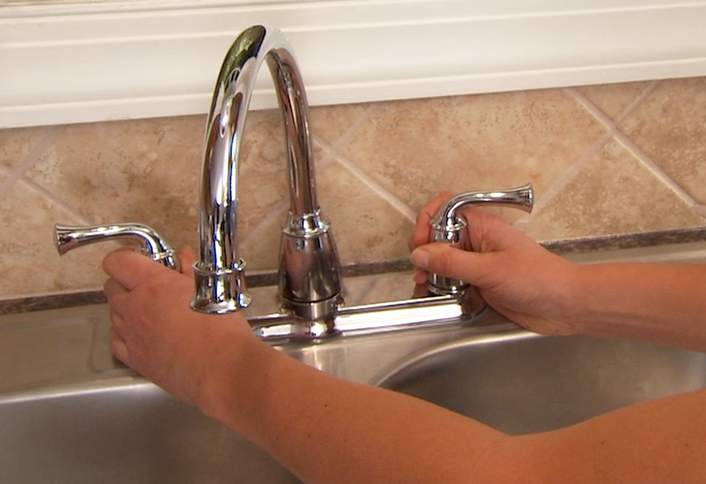
Installing the New Faucet
- Mount with Silicone
To ensure a secure fit for the new faucet, apply silicone sealant around the base before mounting it. This prevents water leakage and enhances durability.
When mounting with silicone, make sure to allow it to cure fully as per the manufacturer’s instructions before using the faucet.
- Upgrade Supply Lines
Consider upgrading the supply lines when installing new faucets to prevent leaks and enhance performance. Opt for durable materials like stainless steel or braided lines for longevity.
Upgrading supply lines also reduces the risk of corrosion and improves water flow efficiency, ensuring a smoother operation.
- Pre-mount on New Sinks
For new sinks, pre-mounting the faucet involves securing it in place before installing the sink. This ensures proper alignment and ease of installation once the sink is in position.
Pre-mounting on new sinks allows for adjustments to be made easily without any constraints from an already installed sink, making the process more efficient.
Finalizing Installation
- Loosen Shutoff Valves
Start by turning off both hot and cold water supply by rotating the shutoff valves clockwise.
Use an adjustable wrench to loosen the compression nuts connecting the supply lines to the faucet.
Gently twist the nuts counterclockwise until they are completely detached from the faucet.
- Remove Aerator
Next, locate the aerator at the tip of the faucet spout and unscrew it using your hand or a pair of pliers if needed.
Inspect the aerator for any debris or mineral buildup that may affect water flow.
Clean the aerator thoroughly with a mixture of vinegar and water to ensure optimal performance once reinstalled.
- Check for Leaks
Turn on the water supply gradually and observe for any leaks around the connections or base of the faucet.
Run both hot and cold water to confirm that there are no leaks or drips present.
If leaks are detected, tighten the connections further or consider applying plumber’s tape to prevent future leaks.
Post-Installation Tips
- Save Instructions
After installing your faucet, store the installation manual in a safe place for future reference. Keep any extra parts in case replacements are needed.
Remember to record the warranty details and save them along with the manual. This information will be crucial if you encounter any issues later on.
In case of any leaks or malfunctions, refer back to the manual before attempting any repairs. Following manufacturer guidelines can prevent any further damage.
- Maintain Your Faucet
Regularly clean your faucet using mild soap and water to prevent mineral buildup and maintain its shine. Avoid harsh chemicals that can damage the finish.
Check for leaks periodically by turning on the water and inspecting all connections. Address any leaks promptly to avoid water damage and wastage.
Consider investing in a water filter system to prolong your faucet’s lifespan by reducing mineral deposits that can cause clogs over time.
FAQs
How Should I Prepare For Faucet Installation?
To prepare for faucet installation, gather the necessary tools like wrenches and plumber’s tape. Turn off the water supply, clean the area under the sink, and read the manufacturer’s instructions thoroughly.
What Is The Process Of Removing An Old Faucet?
Start by turning off the water supply. Use a wrench to disconnect the water supply lines and remove any mounting hardware. Loosen the nuts securing the faucet and lift it out carefully.
How Do I Install A New Faucet Correctly?
Follow the manufacturer’s instructions for your specific faucet model. Apply plumber’s tape to ensure a tight seal, position the new faucet in place, and secure it using mounting hardware. Reconnect the water supply lines and test for leaks.
What Steps Are Involved In Finalizing Faucet Installation?
Check all connections for tightness and leaks. Turn on the water supply and test the faucet operation. Make any necessary adjustments to ensure proper functionality and finish by cleaning up any debris.
Any Tips For Maintaining Faucets Post-Installation?
Regularly check for leaks or drips, clean aerators to prevent clogs, and avoid using harsh chemicals that can damage finishes. Address any issues promptly to prolong the lifespan of your faucet and keep it functioning optimally.
Please call Frasers Plumbing at (619) 332-0275 for any and all of your plumbing needs.
Conclusion
Give Fraser Plumbing Inc. a call right away to learn more about how our experts can help with leak detection in San Diego, CA.